I love the idea of using no-code tools to make mini-apps for your team (and other teams). I knocked together a quick video manifest parser using Bubble and Node.js. A developer could do this on the command line easily but I love being able to open up these type of tools to people who aren’t quite as technical.
This tutorial shows you how to create a Bubble plugin that uses server side actions.
What do we want to achieve here?
- An app that we can pass in a url of a DASH or HLS manifest
- The app outputs the parsed manifest to the screen
How are we going to do this?
- Create a Bubble plugin that takes a url paramater input
- The Bubble plugin should download the manifest from the url
- The manifest should then be parsed using server side actions using either m3u8-parser (if HLS) or mpd-parser (if DASH).
Create a Bubble plugin
- On Bubble go to My Plugins page and click
New plugin
- Name your plugin something catchy. I called mine
manifest-parser. Super catchy.
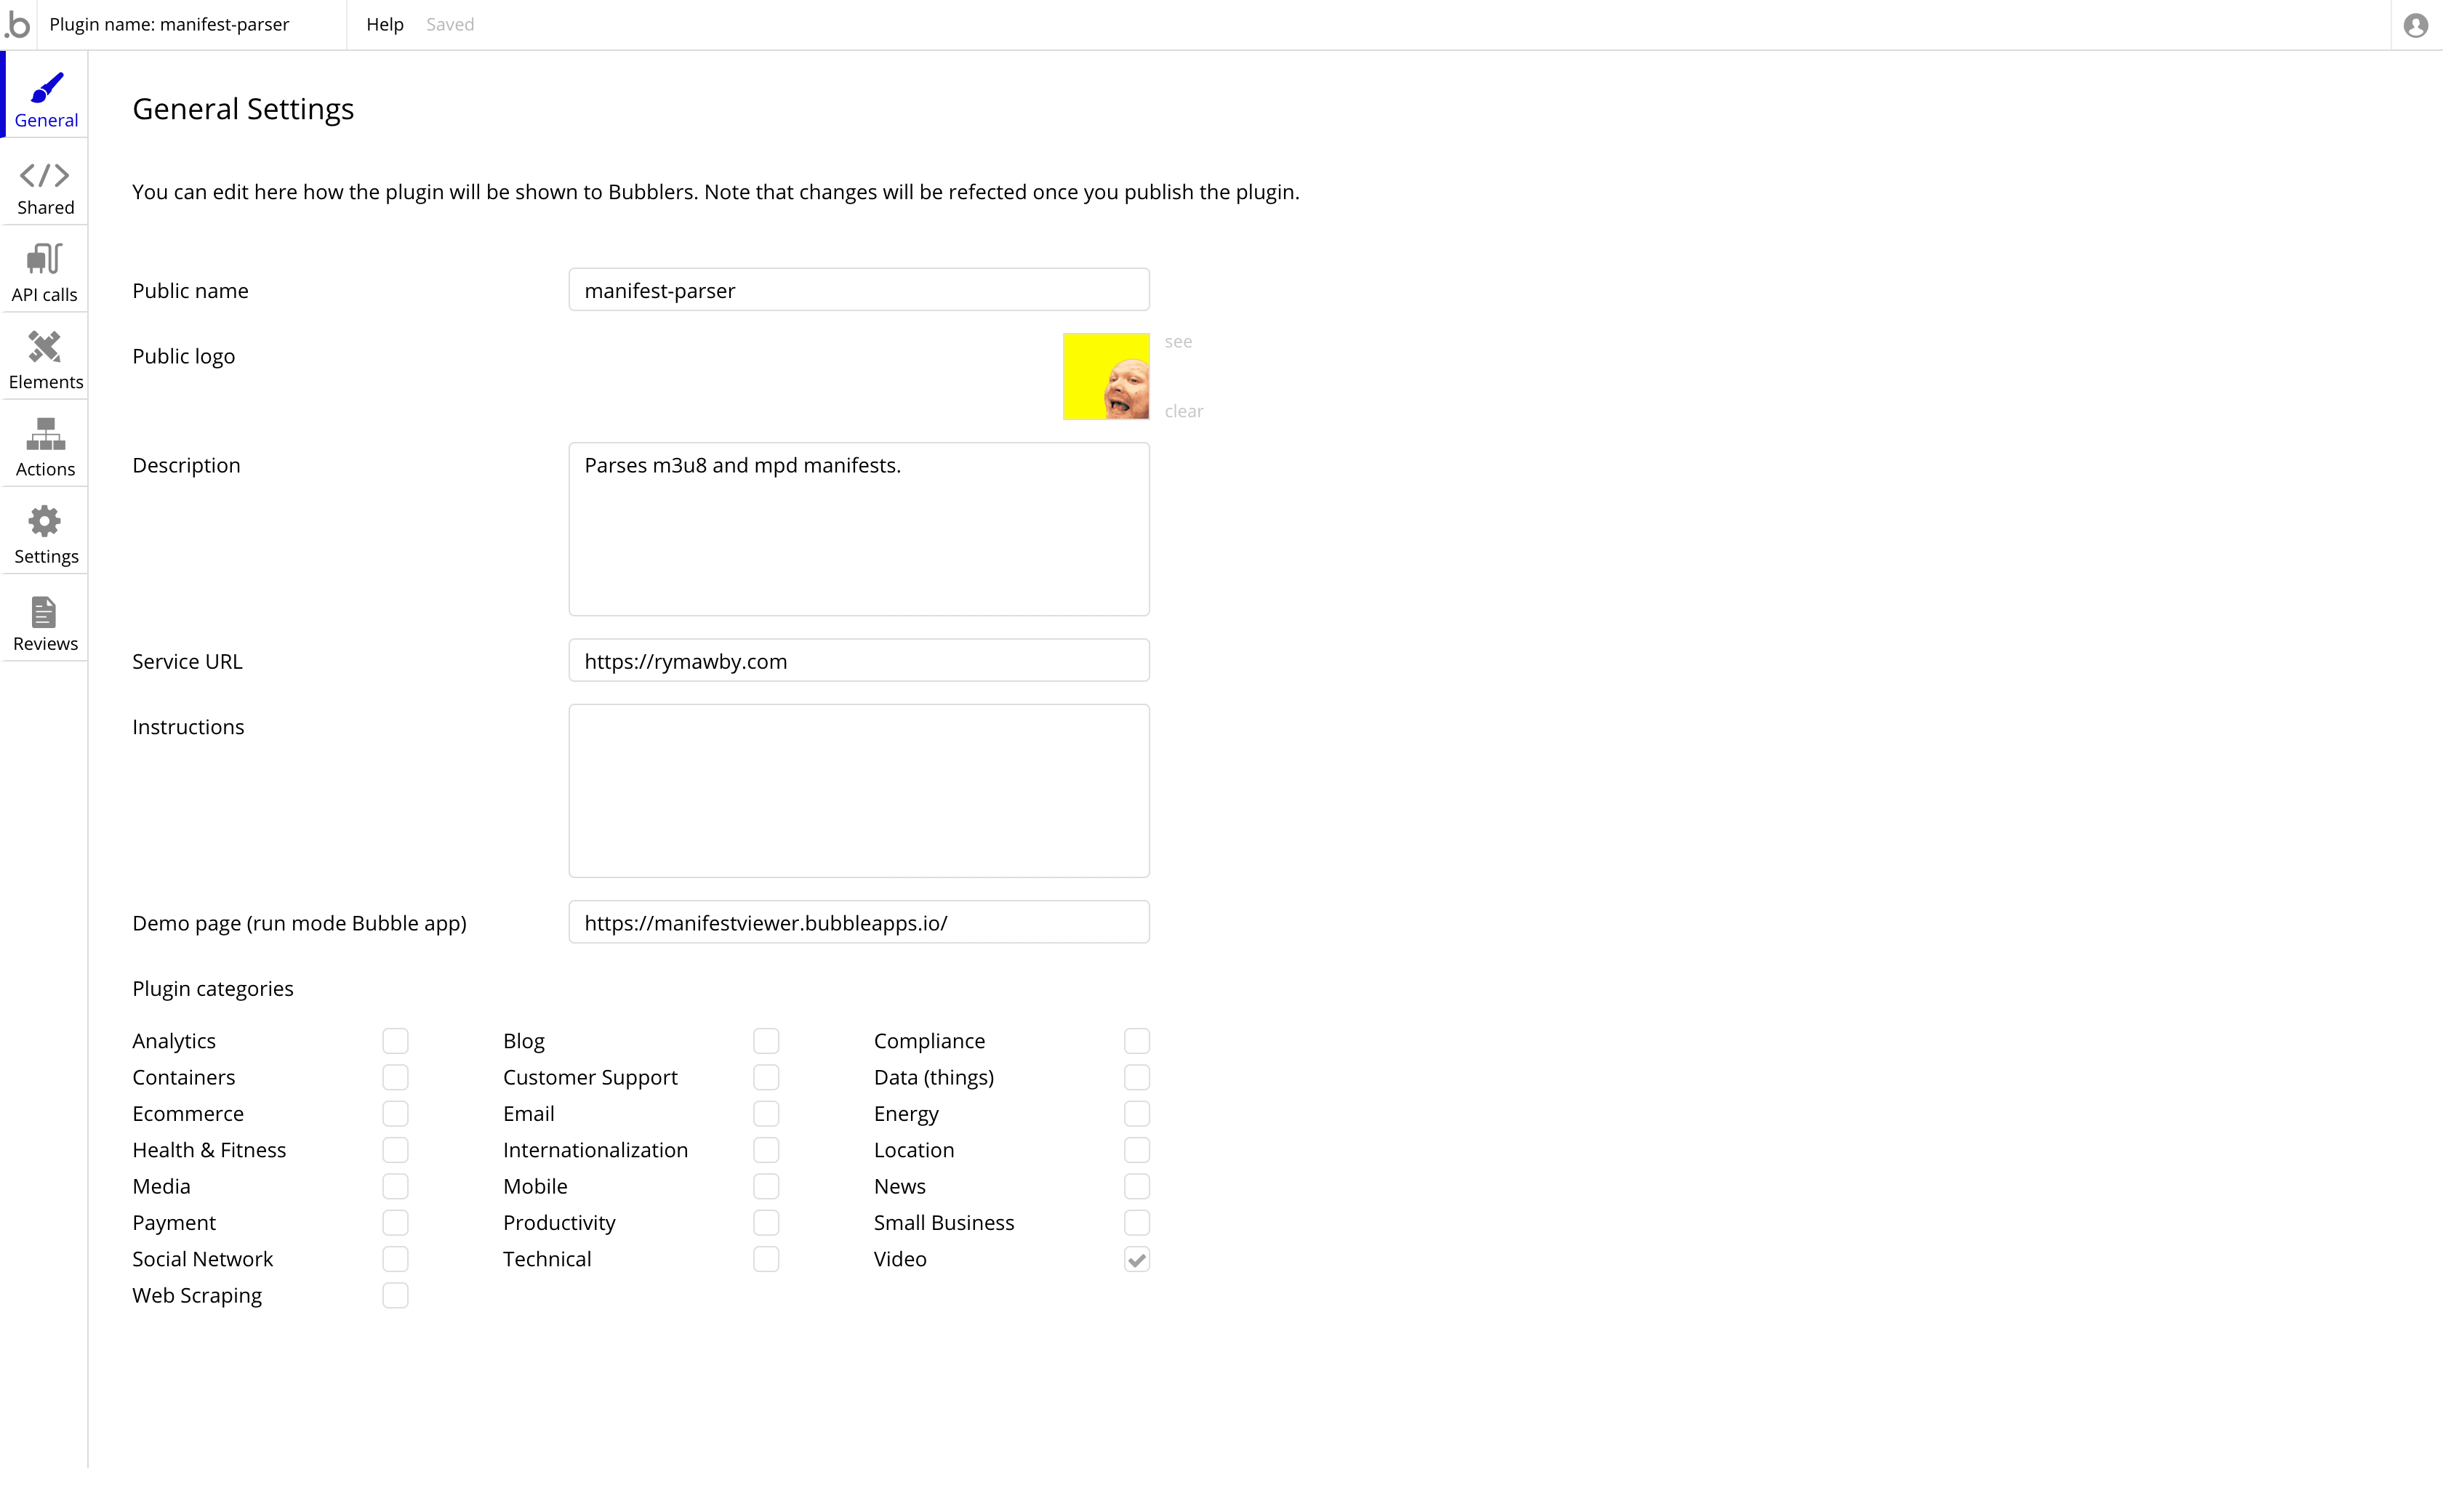
- Fill in your plugin general details.
- On the
Actions tab click Add a new action. Name your action in the popup. In the drop down for Action type select Server side. This is where you can start using the power of Node.js. Exciting. 
- Now we need to pass a couple of parameters to our server code. These are going to be the url of the manifest and the streaming protocol (DASH or HLS). In our server code we will load the url and parse the data loaded with the respective parser (https://www.npmjs.com/package/m3u8-parser for HLS and https://www.npmjs.com/package/mpd-parser for DASH). Fill in the
Fields section like this: 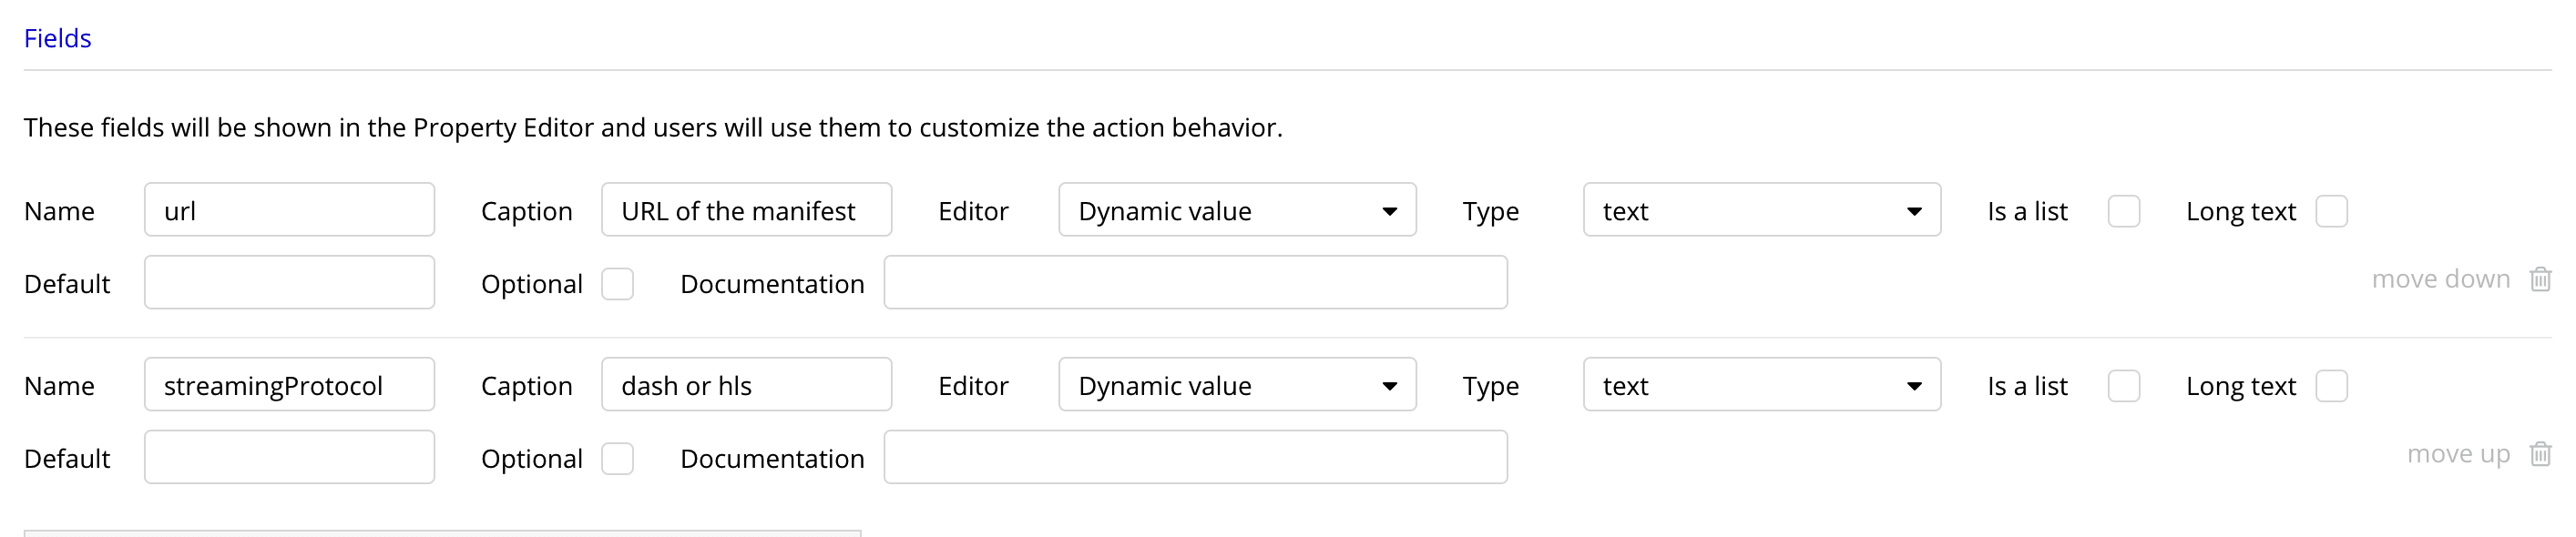
- By doing this we are able to view these params in our test app. I have a
Parse button, an input for the url and a dropdown to select HLS or DASH in my test app. Go to the app you are testing your plugin in and attach a workflow to a button. Now on the workflow you will be able to select your plugin from the Plugins menu. Beautifully illustrated here: 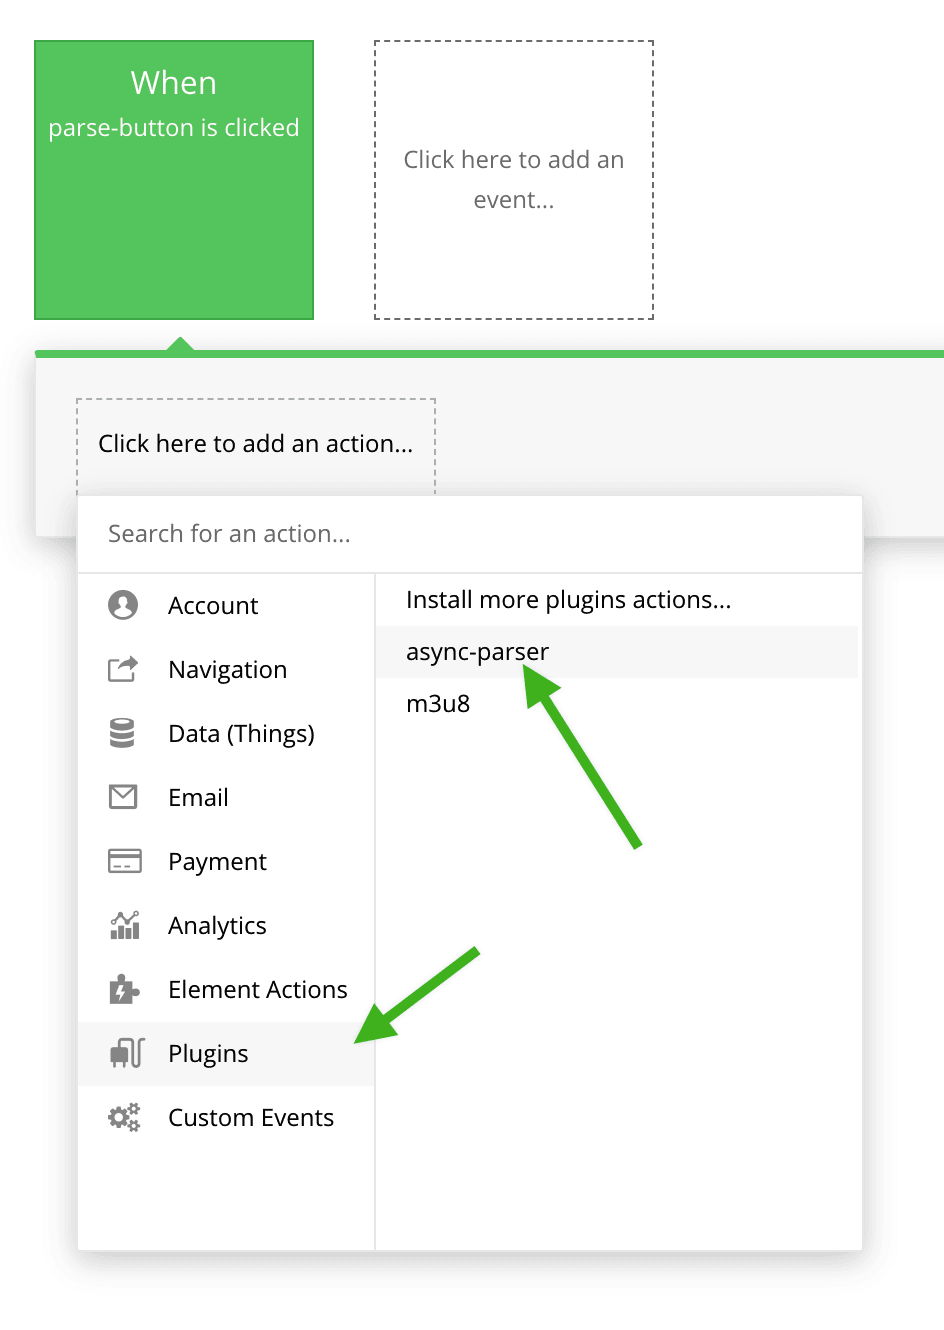
- Now as part of the workflow I can pass in the values from my manifest URL input and the HLS/DASH dropdown, like so:

- Yes! Time for the fun part. Running the server side code and utilising Node.js packages. Hop back into your plugin project. In the
Returned values section add a parsedManifest key to be returned (this will contain a string representation of our parsed manifest - I guess that was kind of obvious from the name) 
- This is the bit that seems to trip people up - doing an asynchronous call from the
run_server function. The below is the basic outline of how to do this. (you’ll notice your dependencies are automatically updated - make sure the This action uses node modules checkbox is checked).
function(properties, context) {

  const fetch = require('cross-fetch');
  var url = properties.url;
  let manifest = context.async(async callback => {
    try{
      let response = await fetch(url);
      let plainText = await response.text();
      callback(null, plainText);
    }
    catch(err){
      callback(err);
  }});
  return {parsedmanifest: manifest}
}
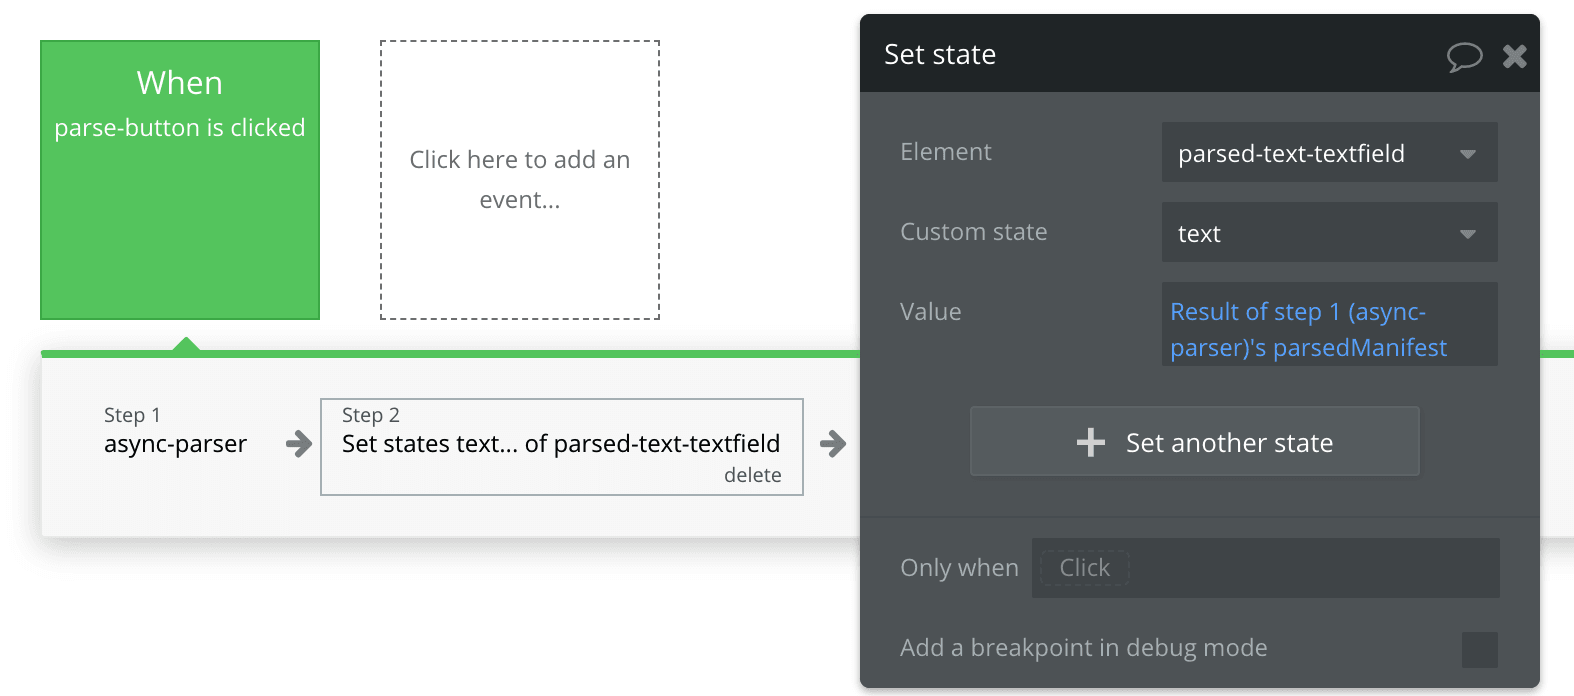
- Now create a textfield in your test app. I use a custom state from the workflow to display the return value of the above:
- Hit
Preview and run your app. Drop in any url and it’ll display the source as a string in the text box - magic! Now all we have to do is flesh out the server-side code a bit and we’re done. Update with the code below and try dropping in a manifest url and running the app.
function(properties, context) {

  var m3u8Parser = require('m3u8-parser');
  var mpdParser = require('mpd-parser');
  const fetch = require('cross-fetch');

  var url = properties.url;
  var isDashProtocol = properties.streamingProtocol === 'dash';
  let manifest = context.async(async callback => {
    try {
      let response = await fetch(url);
      let plainText = await response.text();
      if(isDashProtocol) {
        var parsedManifest = mpdParser.parse(plainText, url);
        callback(null, JSON.stringify(parsedManifest, null, 2));
      } else {
        var parser = new m3u8Parser.Parser();
        parser.push(plainText);
        parser.end();
        callback(null, JSON.stringify(parser.manifest, null, 2));
      }
    }
    catch (err) {
      callback(err);
  }});

  return {parsedmanifest: manifest};
}
Read More